The Story of Branding: How to stand out from the herd
November 12, 2018
New Education: A year without a principal
January 28, 2019I was introduced to leek kimchi by one of our hosts on our European Workaway tour last year. I told her I was planning on making a batch of kimchi, and she had one word for me: “leekchi”. Then she handed me the Mend issue of Taproot magazine. If you live in the U.S. you HAVE to check out that magazine. So much inspiration between the front and back cover!
Leek and Ye shall find
I have to confess, that I’m not a huge fan of leeks. To be honest, I hated them with a passion when I was a kid, along with Brussels sprouts and beets. I love all of them now, though. I realized that I just didn’t like the way any of them were cooked. The thing is, in Germany it gets cold in the winter. So a lot of vegetables are frozen fresh and then cooked frozen. But when you cook a frozen vegetable, it turns to mush. Some more, some less. It has to do with the ice crystals that are formed when the water inside the vegetable freezes. Those ice crystals have sharp edges that cut the cell membranes of the cells. And once the vegetable thaws, it can’t hold its shape anymore, due to cut cell membranes that now leek their contents all over the place, and turns to mush.
That, by the way, is also one of the reasons why we can’t freeze and thaw people. Yet.
Living in California, on the other hand, provided us with fresh produce all year round. So I got to make roasted Brussels sprouts and beets that I bought fresh from the farmers market. And let me tell you, it turned me into a lover of those veggies. I like leek now in small quantities, in soup for example, as long as it’s not overcooked, preferably still a bit squeaky. I still don’t like “creamy” leeks.
My Love Affair with Leek Kimchi
But I do love kimchi. I thought fermenting the leeks might preserve some of the squeakyness. It doesn’t really, but it’s OK. Leekchi quickly became my new favorite. Just like kimchi, I can put it on everything from soups to sandwiches. A little bit of hot and sour makes almost every dish better. Remember, you need to eat at least two tablespoons of fermented products a day for optimal gut health. Leek kimchi is just one more tool in your fermentation tool box to help you achieve that goal.
One last thing: We were celebrating my birthday at a Korean restaurant last year, and my friend told the owner about my leekchi. The owner promptly corrected us, making it clear that “leekchi” is not really the correct way to say it. “Kimchi” doesn’t refer to a dish, but to a method of preparation. So, there are many different kinds of kimchi, depending on the ingredients you use. Baechu-kimchi is probably the one every westerner associates with the word “kimchi”. It’s made with Korean cabbage (or Napa cabbage), carrots and Daikon radishes. But there are many others: Pa-kimchi (green onions), Baek-kimchi (white kimchi – without chili peppers), Buchu Kimchi (Garlic Chives Kimchi), and Oi Sobagi (Cucumber Kimchi) to name a few. Therefore kimchi made with leeks is called leek kimchi.
But let’s cut to the chase, get those leeks ready. Set. Go.
(recipe adapted from Taproot magazine and Kitchen Vignettes)
Ingredients:
3 large leeks (about 8-9 cups thinly sliced)
2.5 tsp sea salt (make sure to use salt without added ingredients like iodine or anticaking agents)
3 large cloves of garlic (about 1.5 Tbsp, minced)
1.5 Tbsp finely grated ginger
1 Tbsp finely grated turmeric (optional, I found some at farmers market when I bought the ginger)
2 minced sardines or anchovies (optional, leave out for a vegan kimchi)
2-3 tsp hot red pepper powder, depending on how hot you like it (Korean kimchi chili, Thai chili or a mix of cayenne, paprika or dried chili flakes)
Instructions:
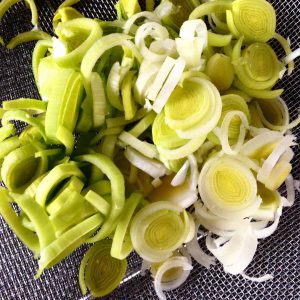
1. Remove the two outer leaves of the leeks and set aside two of them. Cut the leeks in half lengthwise and slice them thinly. Wash the sliced leeks in a colander to get all the sand out. Also wash the outer leaves you saved.
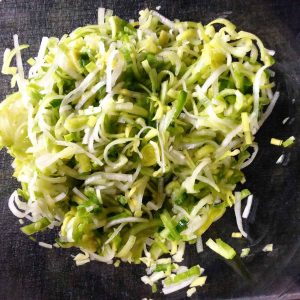
2. Add the leeks to a big bowl and sprinkle the salt in. Massage the leeks until a brine forms at the bottom of the bowl (about 3-5 minutes).
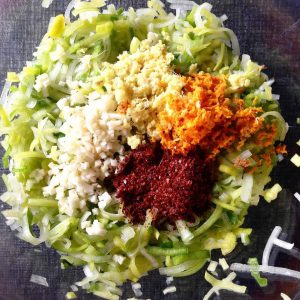
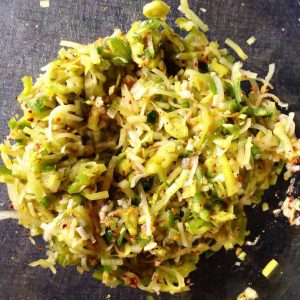
3. Add the minced garlic, grated ginger and turmeric, and the chili powder. Mix everything until well combined.
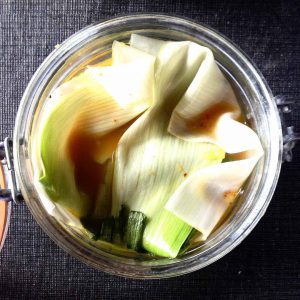
4. Scoop your mixture into your prepared jars, pushing everything down with your hands (or a wooden spoon) as go go along. You’re trying to remove air bubbles and encourage the vegetables to release more of their juices. You want enough brine in the jar to cover your leeks. Leave about 1/2 inch of space to the rim of the jar. Place one of the outer leaves that you had saved at the top of the leeks. This is your sacrificial leave. It keeps your kimchi submerged in brine and prevents it from becoming moldy. If you open your jar at some point and notice mold on top of your sacrificial leave, just toss it. As long as your veggies were covered with brine, they’re fine. Mold cannot grow under water or brine. Close the jar and let your kimchi ferment for at least a week before trying it.
Depending on the jar you’re using you might have to burp your kimchi occasionally for the first few days. I also always put my jars on a plate or into a baking pan to catch any spills that might happen during the first few days when things get really bubbly. Taste it after a week, or let it ferment longer if you prefer a sourer kimchi like me. Transfer to a basement or refrigerator once it has reached its desired level of sourness. Once you opened the jar and removed the sacrificial leaf, store it in the refrigerator.
Enjoy a couple tablespoons as a side dish. I love any kimchi in soups and stews, as well as bean dishes. It adds a flavorful sour spiciness and a ton of nutrition!
-
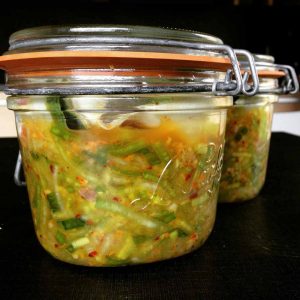
- Don’t forget to date your jars! I usually just do it with a permanent marker on the glass jars. It won’t rub off until you clean the jar. If I give away a jar of Kimchi, I might add a fancy label.
Save
Save


